Windowsill Greenhouse Garden
About the Activity
Start growing plants that you can eat in a homemade salad – or however else you like! In this activity, learn to grow a variety of lettuces and edible flowers in a greenhouse-style, windowsill garden setup. You will learn how to take care of your plants, track growth, and harvest for your family dinner.
Materials
These simple supplies should get you started. Some you may have at home, while others you may have to get from a plant or hardware store.
Clear container with a clear lid, such as a reusable food container or a clamshell container from food delivery or restaurant leftovers
Permanent marker
Labels
Construction Nail (a pointy one!)
A sturdy stick or dowel rod
Spray bottle filled with water
Soil
Lettuce seeds
Activity Steps
In this planting experiment, you will learn the true meaning of eating locally by growing seeds in your own window.
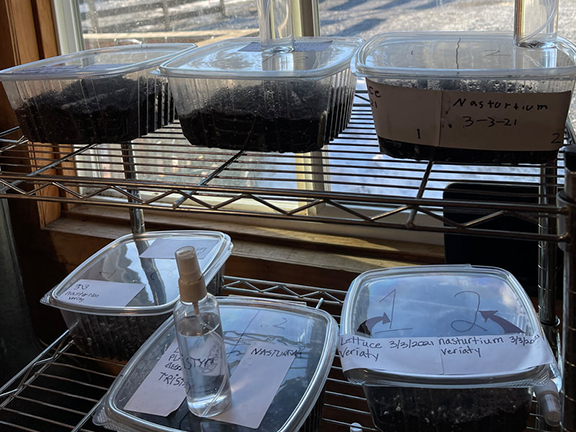
Prep your container
There are a few quick tasks to complete with your container before we start planting seeds.
Fill the container halfway with soil.
Lay your stick or dowel rod down the middle of the container, dividing it in two sections.
Close the container. Label the sections on your lid to represent how the inside is divided (To do this, draw a line down the middle of the lid with your sharpie. Label the left side with the number 1 and the right side with the number 2).
Plant your seeds
It’s time to start planting! However, it’s important to know that no two plants are alike. Follow these instructions to give your plants the best chance for proper growth.
In the section labeled with the number 1, sprinkle salad mix seeds across the top of the soil. Try to distribute the seeds evenly. Cover lightly with soil.
In the second section, plant your nasturtium seeds one-half inch deep in the dirt, but 2 inches apart from one another. Cover with soil.
Gently remove the stick/dowel rod from your container.
Water your plants
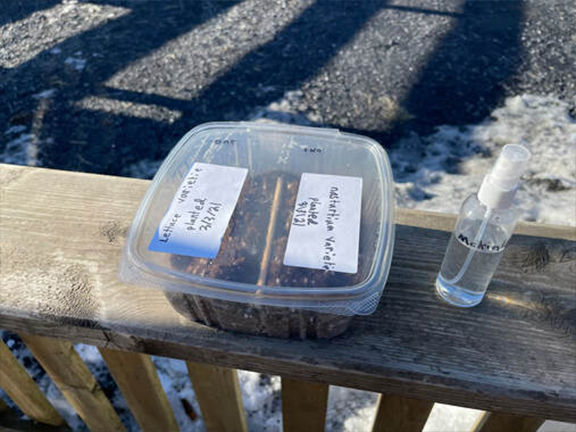
Water your seeds with a mister. Make sure the soil is nice and moist, but not soaking wet. Once you do this, you can close the lid and place the container in a sunny window.
Closing the lid will help to create a greenhouse effect. A greenhouse works by taking in sunlight and heating it up, converting solar energy (sunlight) into thermal energy (heat).
Ongoing care
Plants are like pets. They need continuous care to grow and stay healthy. Use your mister to water your plants every few days (but not daily). Never soak the seeds so much that you need to drain the water. Remember, no puddles!! Use just enough water for the seedlings to grow. You should see sprouts starting to pop up through the soil between days 5 and 10. Congratulations, you have just witnessed the process of germination!! (That’s just a fancy word for when a plant grows from seed).
Tip: When your seedlings start to flourish and reach close to the top of the container, complete the following 3 steps:
- Remove the lid.
- Carefully use a nail (with supervision if you need assistance) to poke 3-4 small holes in the bottom of the container.
- Add a tray or plate underneath the container.
Maintaining healthy seedlings and plants
Once your seedlings start to sprout, take notice of how close together they are. Do they look crowded? Don’t worry! You have options:
Thinning
If there are too many seedlings close together, you will want to remove some. This process of making the plants less crowded is called thinning and prevents the plants from having to compete for natural resources. While it may bum you out to remove some of your seedlings, this process will make for an overall healthier garden and plants, so they don’t have to compete for resources like light, water or air.
You can start the thinning process as soon as the first leaves (also called cotyledon) have fully emerged on your plants. To thin your seedlings:
- Identify smaller or less-healthy-looking plants that you can thin.
- Pinch or cut the plants off at the soil line; don’t pull them out. This will prevent you from damaging the roots of the remaining plants.
Harvest and enjoy
Knowing when to harvest your plants is a critical part of the growing experience. Now that you have grown your plants from seedlings, it’s time to harvest and enjoy!
You can tell when your vegetables are ready for harvest by comparing them to the size and color of fresh vegetables in markets. If you wish, you can harvest leafy vegetables (lettuce, collards, etc.) before they grow as large as those in markets. Lettuce can also be used as you thin it.
Tip: Your homegrown salad contents may not be as large or as blemish-free as market produce, but their flavor will be just as good or better.
Test Your Knowledge
See how much you’ve learned about taking care of plants!
Reflection Questions
Questions for your kids and teens.
What other plants could you try to grow using this method?
How would using an artificial light have changed this growing method?
What different meals would be good for adding lettuce?
What would you do differently the next time you grow seedlings or plants?
Investigate and Explore
Take what you’ve learned to the next level to learn more and explore the possibilities.
Gardeners spend a lot of time planning! See if you can make a plan to grow your own lettuce all summer long, and then test it out!
This work is/was supported by the USDA National Institute of Food and Agriculture, AFRI – Education and Workforce Development project 2021-67037-33376